Installing Minecraft Modpacks (panel.oxy.games)
Modpacks are collections of mods bundled together to offer custom Minecraft gameplay. You can install them directly via the panel in just a few clicks!
Step 1 – What is a Modpack?
A modpack combines multiple Minecraft mods into one ready-to-play experience. Think: magic, quests, RPG mechanics, automation, shaders, and much more—all preconfigured.
Each modpack is built for a specific Minecraft version and mod loader, like:
- Forge
- Fabric
- NeoForge
Some packs exist in multiple loader versions—make sure to match your server's setup.
???? How to change your Minecraft version
Step 2 – Open the Modpacks Menu
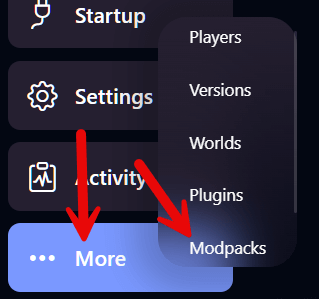
From the side panel, go to More → Modpacks

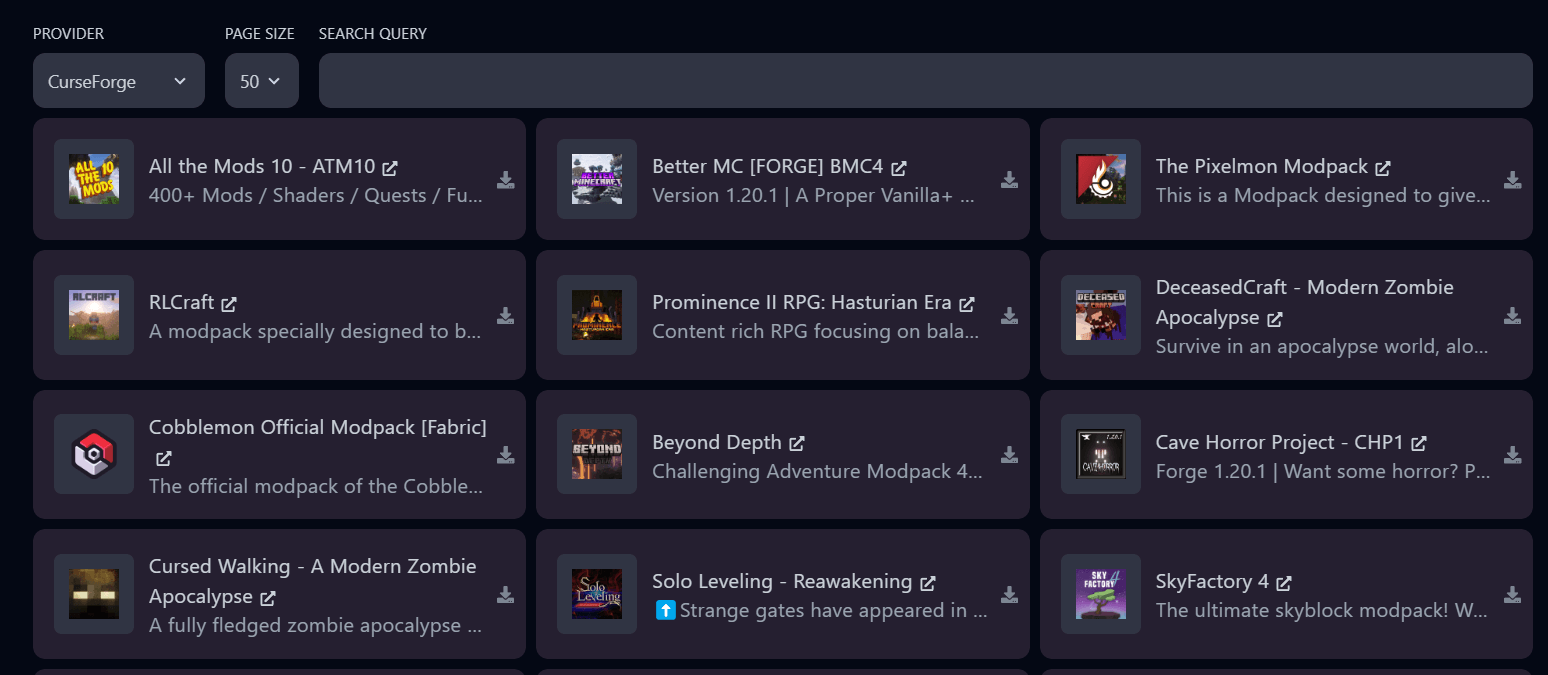
Step 3 – Choose a Provider
Pick from popular modpack sources such as:
- CurseForge – the largest and most popular
- Modrinth – open-source and lightweight
- ATLauncher, Technic – classic launchers with curated modpacks

Step 4 – Search and Select a Modpack
In this example, we’re installing Better MC [NEOFORGE]. Search by name and click the download icon.

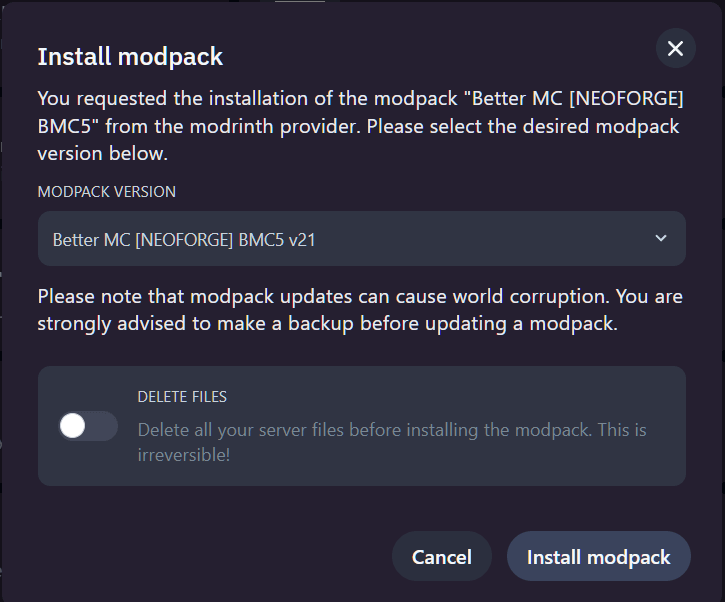
Step 5 – Choose a Version & Optional Cleanup
Select the version you want to install.
Want to start fresh? Toggle DELETE FILES to wipe your server before installing. Warning: This action is permanent!

Click Install modpack to begin.
Step 6 – Installation Starts
You’ll see a notification that the modpack is being installed.

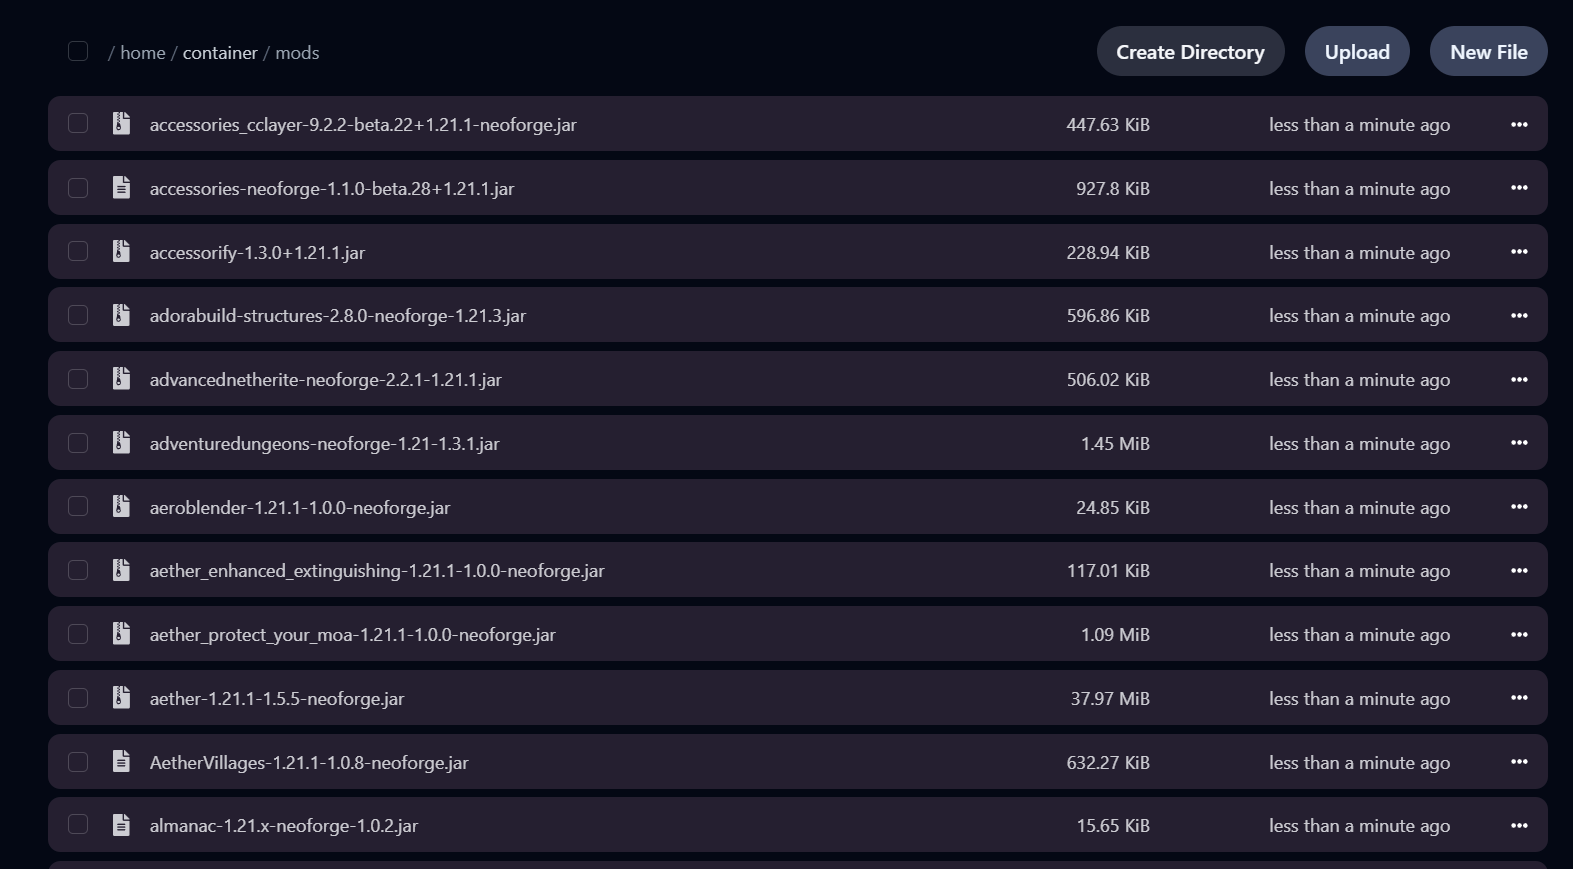
Step 7 – Check the Mods Folder
Once installed, visit your server’s Files section. Open the /mods directory—you’ll see the downloaded files there.

Step 8 – Final Steps
- Once installation finishes, you’ll receive an email confirmation.
- Now you can start your server!
Reminder: Most modpacks don’t include server.jar! You still need to ensure the correct Minecraft version and loader are selected manually.
Step 9 – Console Confirmation
After starting the server, you’ll see logs confirming the modpack is loaded.
✅ Done!
Your Minecraft modpack is now fully installed. Have fun!


