Installing Minecraft Worlds via CurseForge (panel.oxy.games)
Thanks to CurseForge integration, you can easily install a custom Minecraft world with just one click through your OXY.Games control panel.
What is CurseForge?
CurseForge is a popular platform that hosts millions of community creations including mods, modpacks, plugins, and Minecraft maps. And now, you can install those worlds directly onto your server using the panel.
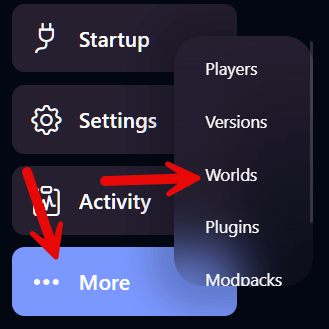
Step 1 – Open the “Worlds” menu
From the left menu, click More and then select Worlds.

Step 2 – Choose your map
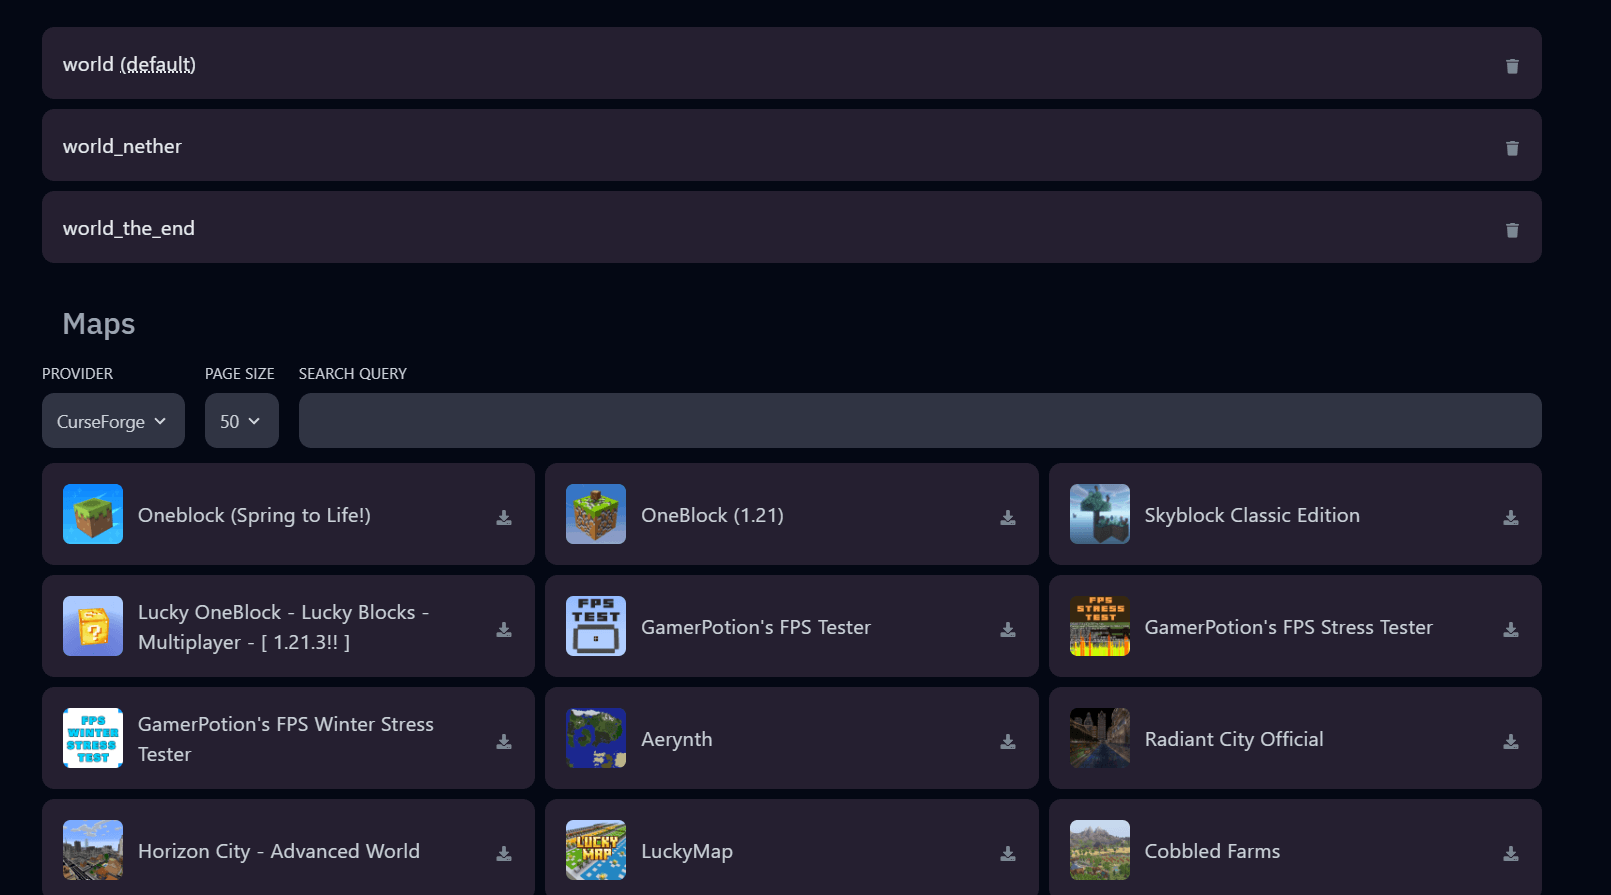
At the top of the page, you'll see currently installed worlds such as:
world(default)world_netherworld_the_end
Scroll down to view the list of downloadable maps available through CurseForge.

For this tutorial, we’re installing Oneblock (Spring to Life!) – one of the most popular Minecraft maps with over 6.5 million downloads!
Click the download icon on the map you want to install.
Step 3 – Installation scheduled
You’ll see a message that the installation has been scheduled:

Step 4 – Set your world as the default
Once the map is installed, it will appear in the list of available worlds at the top.

Click Make default to use this world when your server starts. This will automatically update your server's configuration.

Step 5 – Start your server
Now just start or restart your server.

In the console, you’ll see your new world loading in correctly.


