


Installing Plugins on Your Minecraft Server (panel.oxy.games)
Plugins allow you to expand your Minecraft server with useful features, extra commands, performance improvements and more.
Important: Plugins only work with specific server software
Plugins only work with certain types of Minecraft server software:
- Spigot or Paper – the most common platforms for plugins
- Purpur, Pufferfish – forks with extra features, fully compatible with Spigot plugins
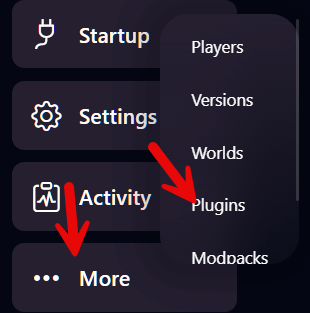
Step 1 – Open the Plugins menu
In the left panel, click on More and then Plugins.
Step 2 – Choose a provider
At the top, select which plugin provider you'd like to use. Some popular options include:
- SpigotMC – The classic and largest plugin library
- Modrinth – Modern, open-source platform for plugins and mods
- CurseForge – Known for modpacks, but also hosts plugins
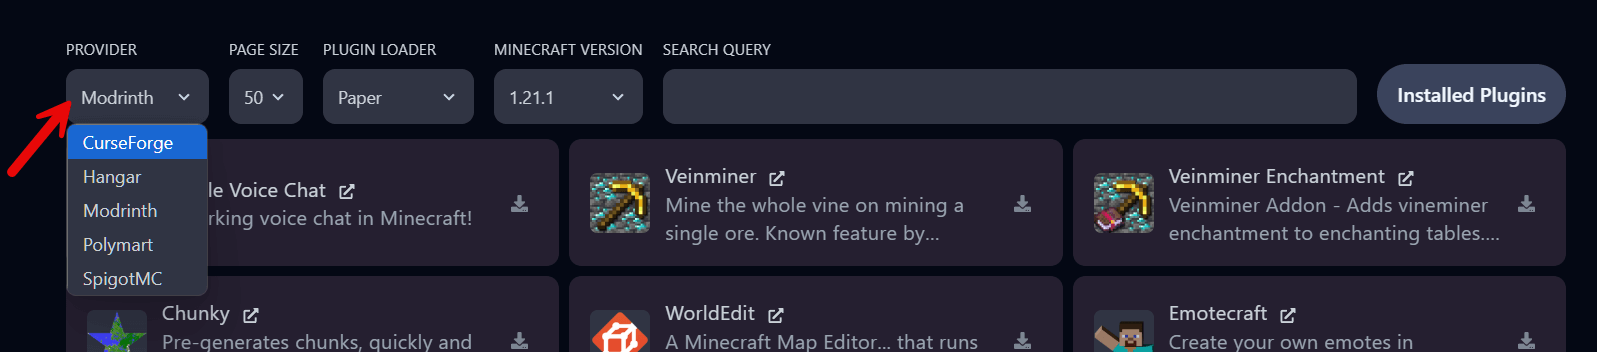
In this guide, we’re using Modrinth and searching for Minecraft version 1.21.1 with Paper as the loader.
Step 3 – Search and select your plugin
We’ll install Teak’s Tweaks – a lightweight plugin that offers over 150 toggleable features, like disabling mob griefing or adjusting mob behavior.
Search for it by name and click the download icon.

Step 4 – Confirm installation
You’ll be asked to select a specific version of the plugin. The latest is usually pre-selected.
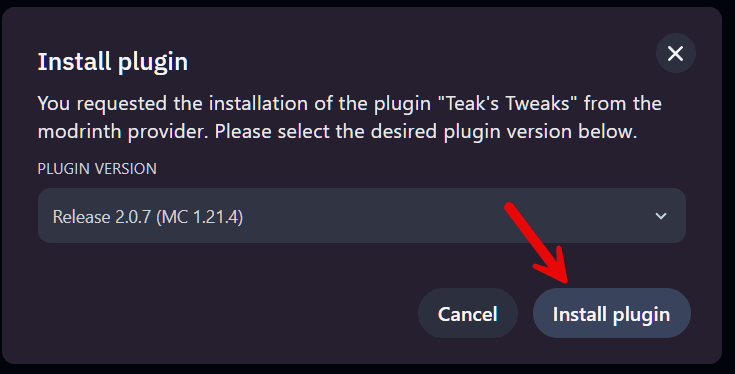
Click Install plugin.
If successful, you’ll see a confirmation message:

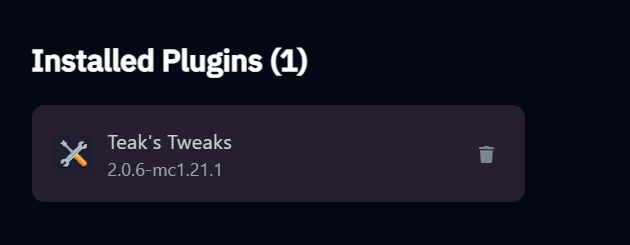
Step 5 – Check if your plugin is active
Click the Installed Plugins button at the top right.

You’ll see a list of all active plugins:
Step 6 – Locate the plugin in your file manager
In the left menu, click Files. Go to the /plugins folder.
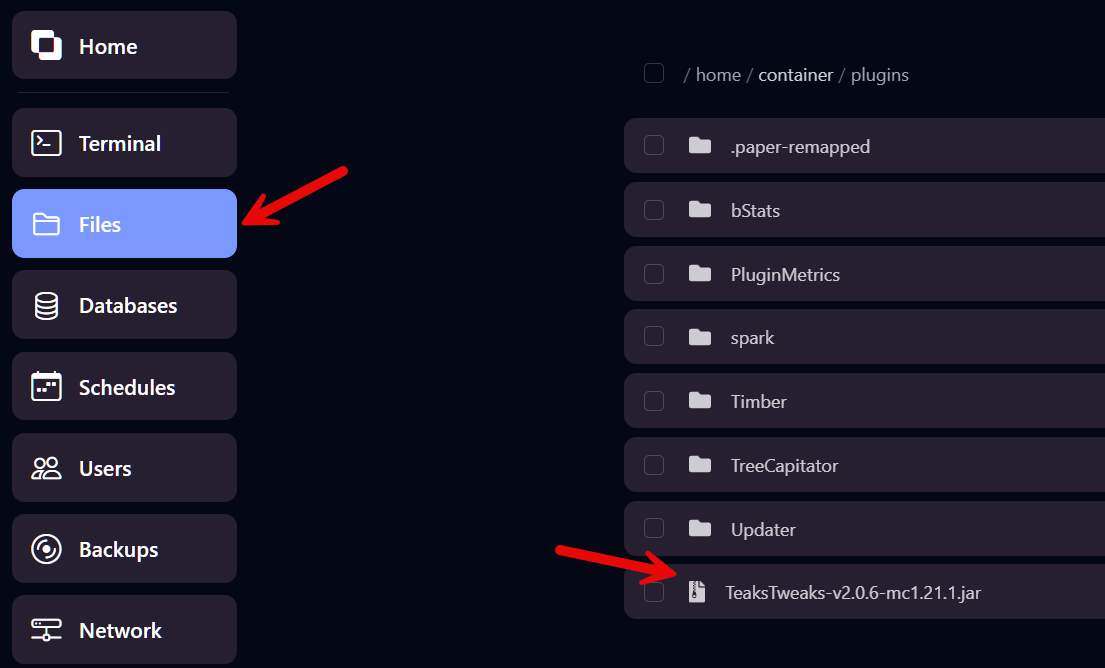
Your plugin file (.jar) will be there. It will be loaded the next time your server starts.
Heads up: Some plugins need extra configuration
- Some plugins create a
config.ymlfile where you can customize features - You may need a permission manager like LuckPerms to manage access
- Plugins that use ports (like Dynmap or voice chat) may require port opening – contact support!
