First steps in your game panel (panel.oxy.games)
Yes! You’ve successfully logged in to the control panel. Time to take your first look at your Minecraft server environment.
Welcome to your server dashboard
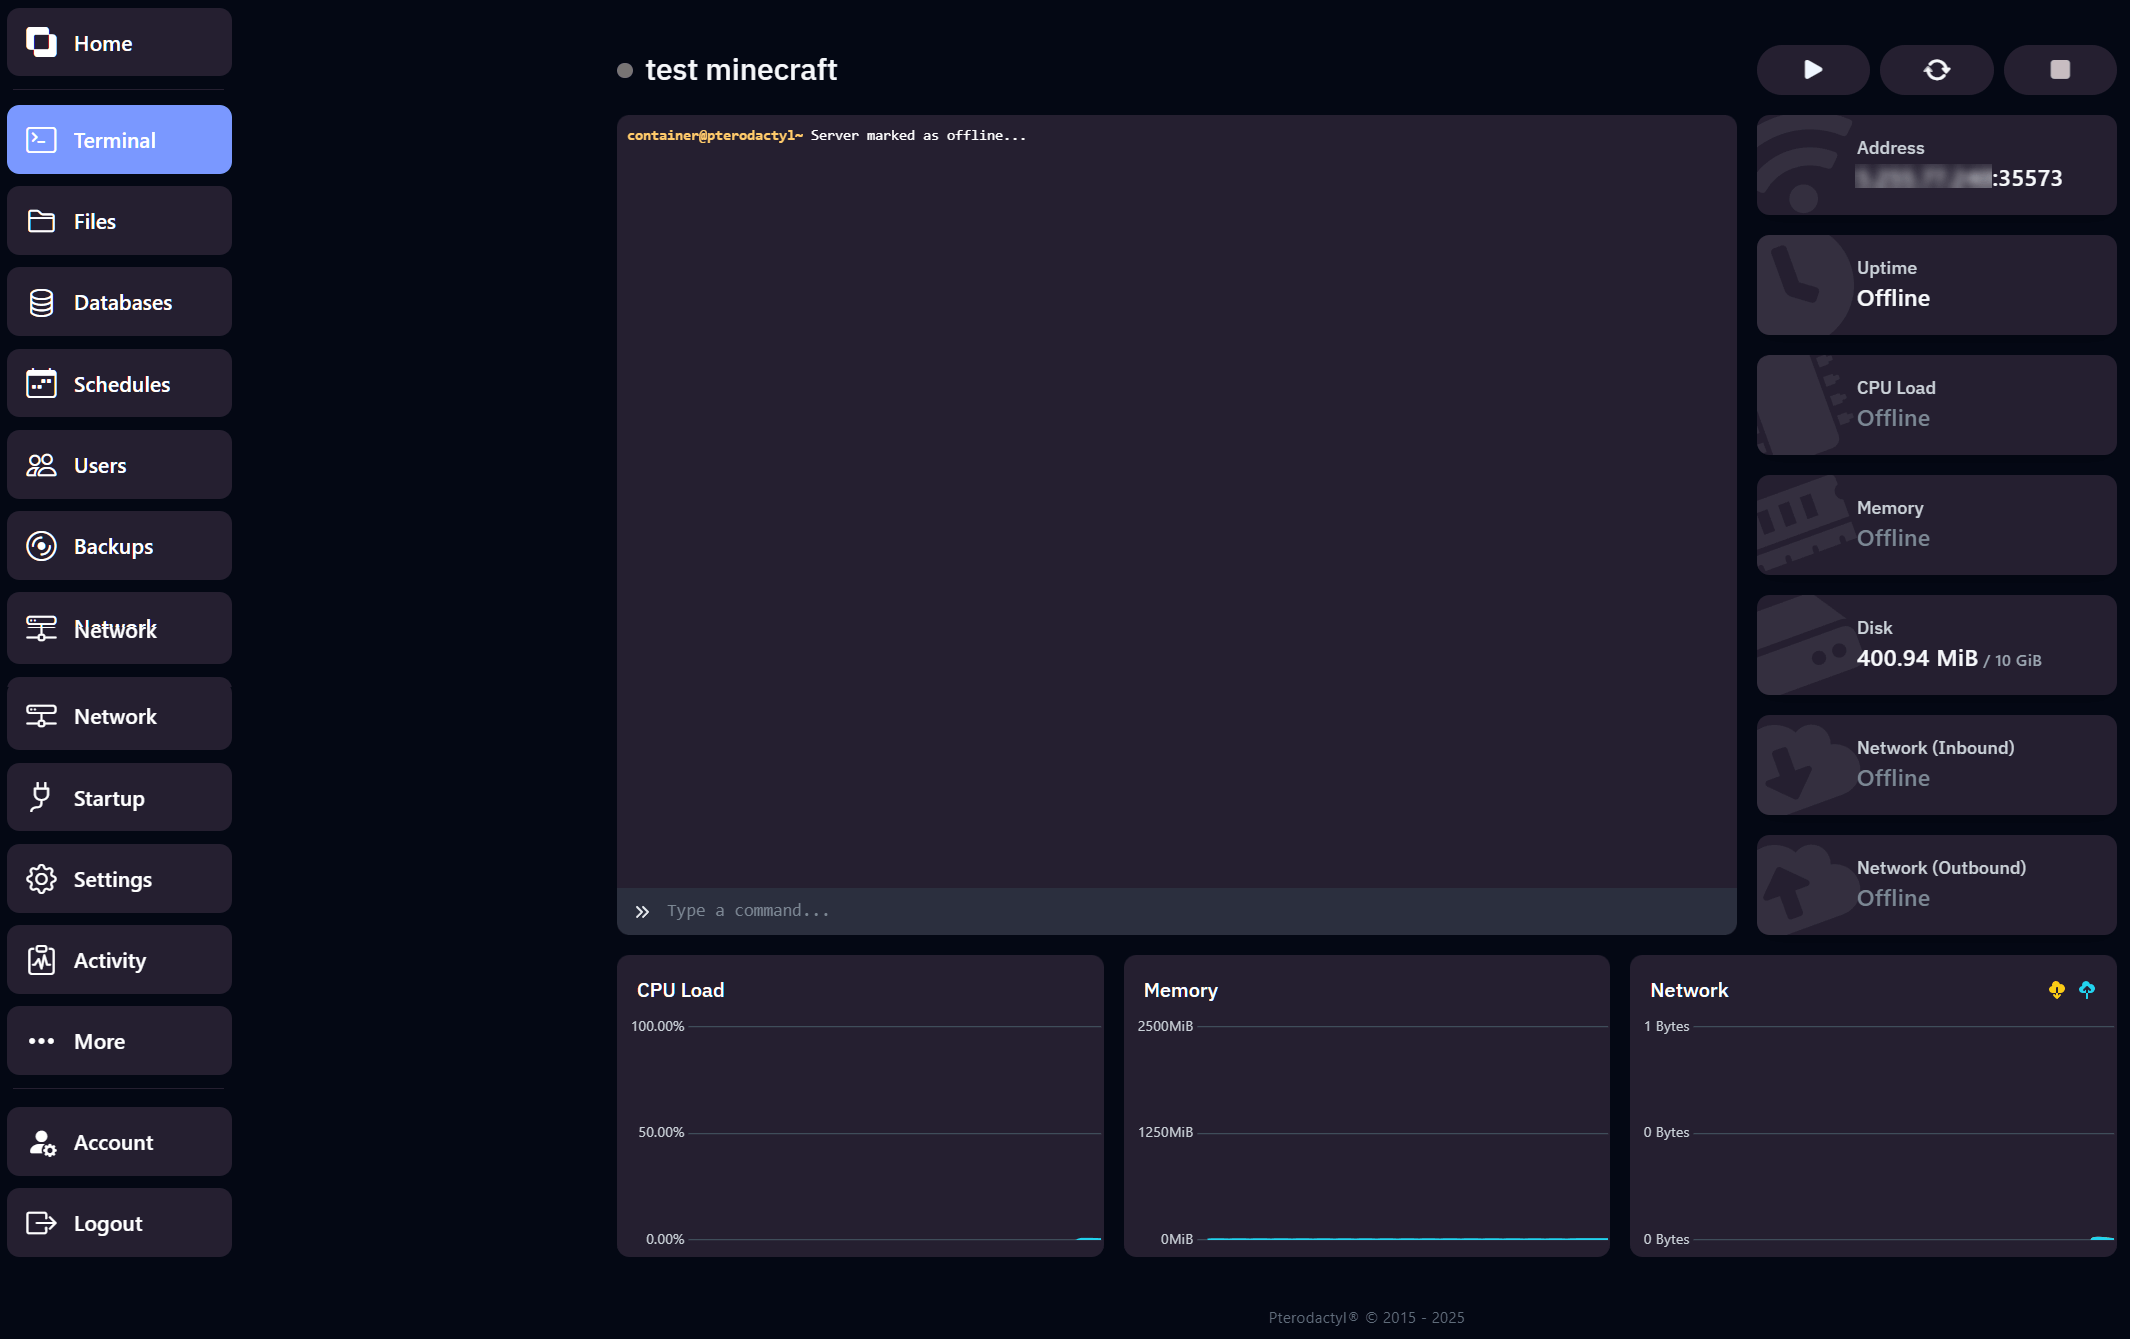
After logging in, you’ll land on your server’s overview screen. This is your control center – here you can check your server status and access all the tools you need.
Example screen after login:

What are you looking at?
- Server name: The name you picked or that was assigned to you.
- Server status: Offline, Online or starting up.
- IP address + port: You’ll use this to connect to your Minecraft server.
- Disk usage: How much storage your server is using right now.
- Top-right buttons:
- Start – Start your server
- Restart – Restart your server
- Stop – Shut down your server
Terminal and live console
In the middle of the screen, you’ll see the console. This is where all activity on your server is shown in real time:
- Whether your server started correctly
- Which plugins or mods are being loaded
- Any error messages or issues
You can also type commands at the bottom – for example, /op yourname to give yourself admin rights in Minecraft.
What now?
Your server is currently offline. Click the Start button at the top right to launch your server.
Once your server is online, you can connect to it in Minecraft using the IP and port (for example: 5.255.77.240:25573).
On the very first startup, you may see the following screen:

This is the Minecraft® EULA (End User License Agreement). You must accept it before the server can start.
After accepting, the server will automatically continue starting.
Ready to play?
Hit Start, connect using the IP address in your Minecraft client, and begin building, surviving or exploring with friends!


